Crunchy, Chewy, Chocolatey: Your Ultimate Easy Rocky Road Bark Recipe
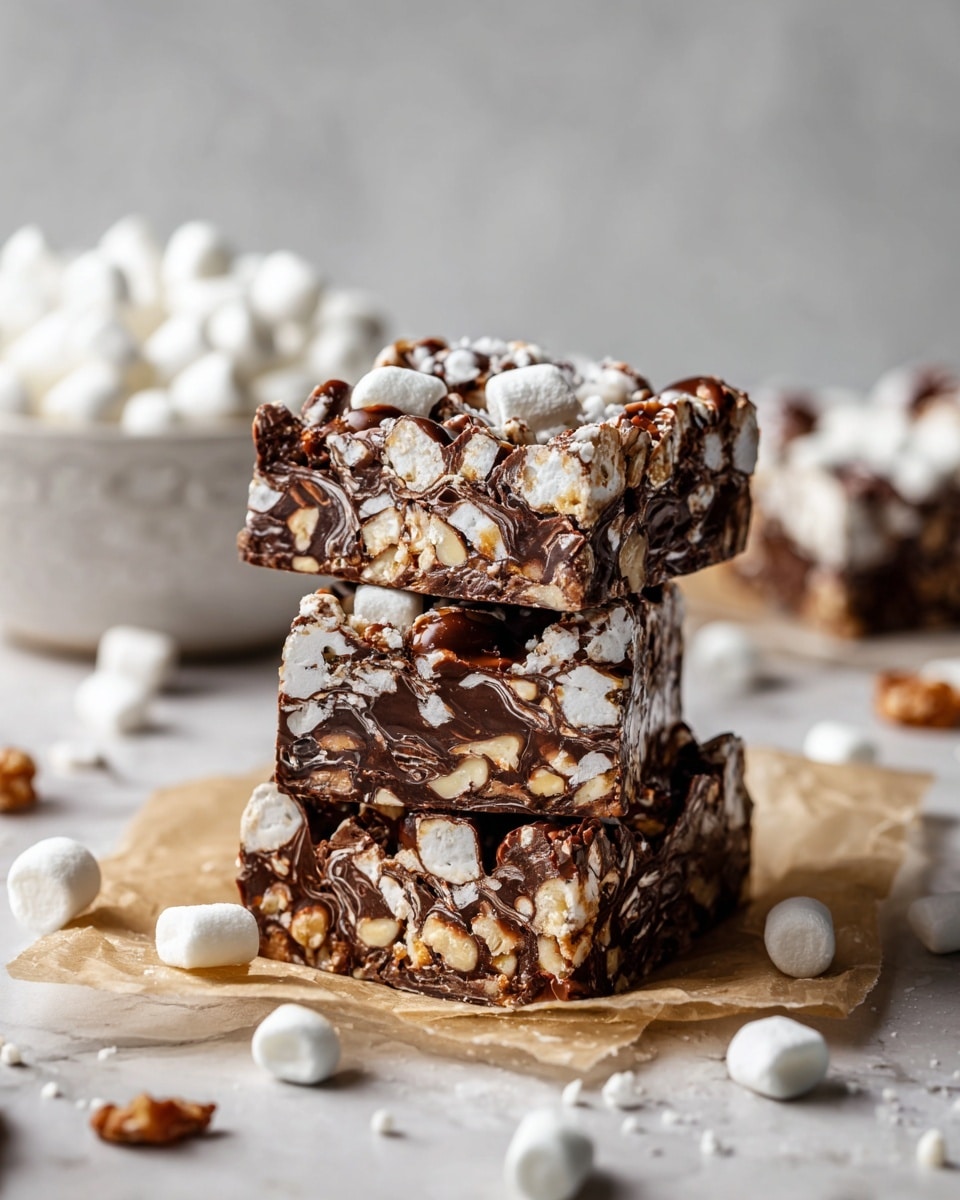
Craving a sweet treat that delivers an irresistible symphony of textures and flavors? Look no further than this delightful rocky road bark recipe. Imagine rich, velvety chocolate studded with fluffy, chewy marshmallows and the satisfying crunch of nuts – all in one bite. This no-bake wonder is not only incredibly simple to make but also visually stunning, making it a perfect candidate for holiday gifts, party platters, or simply an indulgent evening snack. Forget the fuss of traditional baking; this chocolate bark comes together in minutes, offering a stress-free path to a truly memorable dessert.Unveiling the Magic: Why Rocky Road Bark Reigns Supreme
In a season often dominated by intricate cookie recipes and oven-bound desserts, the humble chocolate bark emerges as a true hero. What makes a rocky road bark recipe so captivating? Its sheer simplicity and speed are undeniable. Unlike cookies that demand precise measurements, multiple baking sheets, and vigilant oven-watching, this treat requires no baking at all. You can whip up a batch (or several!) in mere minutes, making it an ideal choice when time is short but the desire for homemade goodness is high. Beyond its ease, rocky road bark offers unparalleled versatility. It looks incredibly impressive when broken into rustic shards, instantly elevating any dessert spread. For those looking to give thoughtful, homemade gifts, this bark is a revelation. A single batch can yield numerous portions, perfect for packaging into charming bags or small boxes. It's a gift that speaks volumes of care and effort, without actually demanding much of either! The inspiration for rocky road often harks back to comforting classics like hot chocolate, brimming with melting marshmallows. This bark captures that same cozy, nostalgic essence, transforming it into a solid, shareable delight. If you've ever found joy in a marshmallow-topped cocoa, you'll undoubtedly fall in love with this chewy, chocolatey creation. And once you master this basic easy rocky road bark technique, the world of chocolate barks, with endless possibilities for customization, truly opens up before you.Your Go-To Easy Rocky Road Bark Recipe: Ingredients & Equipment
The secret to an irresistible rocky road bark lies in the thoughtful selection of a few key ingredients, each playing a crucial role in creating that perfect balance of textures and flavors. This recipe highlights a delightful twist on the classic rocky road, focusing on semi-sweet chocolate for a deep cocoa flavor that isn't overly sweet, complemented by the creamy richness of butter, the signature chew of marshmallows, and the satisfying crunch of walnuts.The Essential Ingredients:
- 10-ounce bag large marshmallows (not mini): While mini marshmallows might seem convenient, cutting larger ones into quarters ensures distinct, gooey pockets throughout the bark. This strategic cut prevents them from melting completely into the chocolate, maintaining that signature chewy texture. Pro tip: Dip your scissors in water after every few cuts to prevent sticking!
- 8 ounces semi-sweet baking chocolate: High-quality chocolate is paramount here. Semi-sweet offers a beautiful balance, providing a rich cocoa base without being cloyingly sweet. You can use chocolate chips, chunks, or a finely chopped bar. For the best melting and texture, opt for baking chocolate over candy melts.
- ½ cup butter, cut into chunks: Butter is the unsung hero, melting seamlessly with the chocolate to create an incredibly smooth, luxurious, and luscious texture. It adds a depth of flavor that elevates the entire bark.
- 1 teaspoon vanilla extract: A small splash of pure vanilla extract adds a warm, aromatic depth, enhancing the chocolate's natural flavors and tying all the components together.
- ½ cup chopped walnuts (optional): Walnuts bring that essential nutty crunch, providing a wonderful textural contrast to the soft marshmallows and smooth chocolate. While optional, they are highly recommended for the classic rocky road experience. Feel free to substitute with other nuts or omit if preferred.
Tools of the Trade:
- 8x8 inch baking pan: This size is perfect for creating a bark of ideal thickness. You can also use a 9x13 inch pan for a thinner bark, adjusting the chilling time slightly. For gifting, mini disposable loaf pans offer charming individual portions.
- Non-stick cooking spray or butter: Essential for greasing the pan, ensuring your finished bark lifts out effortlessly. Alternatively, lining your pan with parchment paper is an excellent option for even easier removal and cleanup.
- Saucepan (or double boiler): For gently melting the chocolate and butter. A double boiler is ideal for preventing scorching, but a heavy-bottomed saucepan over low heat works perfectly with constant stirring.
- Spatula or spoon: For stirring the chocolate mixture and spreading the bark.
- Sharp knife or kitchen scissors: For cutting marshmallows and, eventually, breaking the bark.
Crafting Perfection: Step-by-Step Instructions for Your Rocky Road Bark
Creating this delightful rocky road bark is a straightforward process, broken down into simple, easy-to-follow steps. Precision isn't as critical as with baking, but thoughtful execution ensures a perfect result every time.- Prepare Your Pan: Begin by greasing an 8x8 inch baking pan with non-stick cooking spray or butter. For even easier removal and cleanup, line the pan with parchment paper, leaving an overhang on the sides to use as "handles" later. If you're thinking ahead for gifts, consider lining several smaller mini loaf pans.
- Marshmallow Magic: Take your large marshmallows and, using clean kitchen scissors (dipped in water occasionally to prevent sticking), cut them into quarters. Evenly spread these marshmallow pieces across the bottom of your prepared pan. They don't need to be in a single layer, as some will nestle into others, creating delightful clusters.
- Melt the Chocolate Dream: In a saucepan set over very low heat, combine the semi-sweet chocolate and chunks of butter. Stir constantly and patiently until the mixture is smooth and completely melted. Be mindful not to rush this process with high heat, as chocolate can scorch easily. Alternatively, use a double boiler for a more gentle melt, or even microwave in 30-second intervals, stirring between each, until smooth. Once melted, remove from heat.
- Infuse with Vanilla: Stir the vanilla extract into the melted chocolate and butter mixture until well combined. The vanilla adds an aromatic complexity that truly elevates the chocolate's flavor profile.
- Assemble Your Bark: Carefully pour the warm, melted chocolate mixture over the marshmallows in the prepared pan. Use a spatula to gently spread the chocolate evenly, ensuring most of the marshmallows are coated. Avoid pressing down too hard, as you want some marshmallows to peek through and others to be fully enrobed.
- Add the Crunch: If using, sprinkle the chopped walnuts evenly over the top of the wet chocolate. Gently press them down slightly so they adhere to the chocolate. You can also add a sprinkle of sea salt flakes here for a gourmet touch that contrasts beautifully with the sweetness.
- Chill to Perfection: Place the pan in the refrigerator and chill for at least 1-2 hours, or until the chocolate is completely set and firm. This crucial step ensures the bark holds its shape and breaks cleanly. For a quicker set, you can place it in the freezer for about 30-45 minutes.
- Break and Enjoy: Once fully set, lift the bark out of the pan using the parchment paper overhangs. Place it on a cutting board and use a sharp knife or your hands to break it into irregular, rustic pieces. The charm of bark lies in its imperfect, organic shapes!
Elevate Your Bark: Customization & Expert Tips
Customization Ideas:
- Nutty Variations: Instead of walnuts, try pecans, almonds, peanuts, or even a mix of your favorite nuts. Toasting them lightly beforehand can enhance their flavor.
- Fruity Flair: Introduce dried cranberries, cherries, or even chopped dried apricots for a burst of color and tangy sweetness.
- Salty & Sweet: For a delightful contrast, crush some pretzels and sprinkle them over the chocolate along with the nuts. A sprinkle of flaky sea salt on top after pouring the chocolate is also a fantastic addition.
- Spice It Up: A pinch of cinnamon, a dash of chili powder (for a Mexican hot chocolate vibe), or even a touch of espresso powder can add intriguing depth to the chocolate.
- Decorate with Dazzle: Before chilling, sprinkle with colorful sprinkles for a festive look, or drizzle with melted white chocolate for an elegant finish.
- Chocolate Choices: While semi-sweet is traditional, feel free to experiment with dark chocolate for a more intense flavor, or milk chocolate for a sweeter profile. You could even do a swirl of both!
Gifting & Presentation:
Rocky road bark makes an exceptional homemade gift. Package shards in cellophane bags tied with festive ribbons, or arrange them neatly in small decorative boxes. Label them with a handwritten tag for a personal touch. Remember, presentation significantly enhances the gift's appeal. Consider making a batch specifically for gifting; it’s a quick & simple rocky road bark that everyone loves.
Storage Tips:
Store your rocky road bark in an airtight container at room temperature for up to a week. If your home is particularly warm, or for longer storage (up to two weeks), keep it in the refrigerator. Just be aware that refrigeration can sometimes cause chocolate to "bloom" (a white film on the surface), though it's still perfectly safe to eat. For the freshest taste and texture, bring it back to room temperature for about 10-15 minutes before serving.
This quick & simple rocky road bark is a testament to the idea that some of the most satisfying treats are also the easiest to make. Its blend of creamy, crunchy, and chewy textures, coupled with deep chocolate flavor, makes it an instant crowd-pleaser. Whether you're whipping it up for a last-minute party, creating heartfelt holiday gifts, or simply indulging your own sweet tooth, this recipe promises joy and deliciousness with minimal effort. So go ahead, gather your ingredients, and prepare to embark on a delightful culinary journey to the heart of rocky road bliss!